
By James Gallagher for Steampunk Coffee
Missing your favourite milky drink from a cafe but don't have an espresso machine at home? Check out this clever coffee hack from our home brewing blogger James.
It has been a few months since I have had a cappuccino from a coffee shop, which has long been one of my favourite milky coffee drinks. I share my affection for cappuccinos with Niles Crane from Frasier, who also favours the drink (and probably many other people out there who enjoy milky coffees).
There are many ways to make a cappuccino and some people will tell you that there are "proper" ways. I have read that a cappuccino should be equal-parts coffee, milk, and foam, whereas other people dispute this claim. But there is one thing we can all agree on: in essence, a cappuccino is a mixture of coffee and milk with some foam on top.
I do not have an espresso machine at home (they are too pricey!) so I thought I would improvise and try to make a cappuccino with what I do have. If you are yearning for a cappuccino -- or just want to try a new recipe for making coffee -- keep reading. I will share the recipe I used this morning to make what I thought was a delicious cappuccino which I would feel comfortable sharing with others.
To get started, you will need:
- A pour-over brewing device or an Aeropress
- Milk
- A French press
- A spoon (used for scooping your foam)
- A thermometer (optional, but preferred)
I decided to use my Kalita Wave to brew my coffee. But to make a cappuccino, I did not want to brew as much coffee as normal. My cup is normally almost full and so I would not have much room left for milk if I brewed the same amount of coffee as a normal cup. For this recipe, I brewed 200 grams of coffee using 12 grams of beans. This is a 60 grams coffee / 1000 grams water ratio. Some of the water did not make its way to the final cup, so I estimate I had about 170 grams of coffee at the end.
Next, I measured out some milk in my French press. I measured out about one third of my French press in milk, which was the smallest size. In hindsight, I would measure out about 100 grams of milk, which I think is enough if you are brewing a cappuccino at home.
I poured this milk into a saucepan and set the pan to a medium heat. My goal was to heat the milk to anywhere between 50 and 70 degrees Celsius. My ceiling was 80 degrees Celsius, which is considered too hot for milk which you use to brew coffee. I kept applying heat until the pan started to simmer a bit and then I turned down the heat, keeping an eye on the temperature. My milk was over 50 degrees. Because this was my first time heating milk for a cappuccino, I did not want to risk getting too close to my 80 degrees ceiling which I set, so I erred on the side of caution and kept the milk at a lower temperature.
After following these steps, I had two products: brewed coffee and warmed milk. But there is still one ingredient I need: milk foam.
That is where my French press comes in handy. I have the smallest size of French press which I think is just right for making a cappuccino at home; the device is not too big nor too small. I decanted the warm milk from my saucepan into my French press and then pushed the plunger up and down. I pushed the plunger up and down about ten times and then pushed in the milk about twenty more times (which I read from a few places is a good way to keep the bubbles smaller).
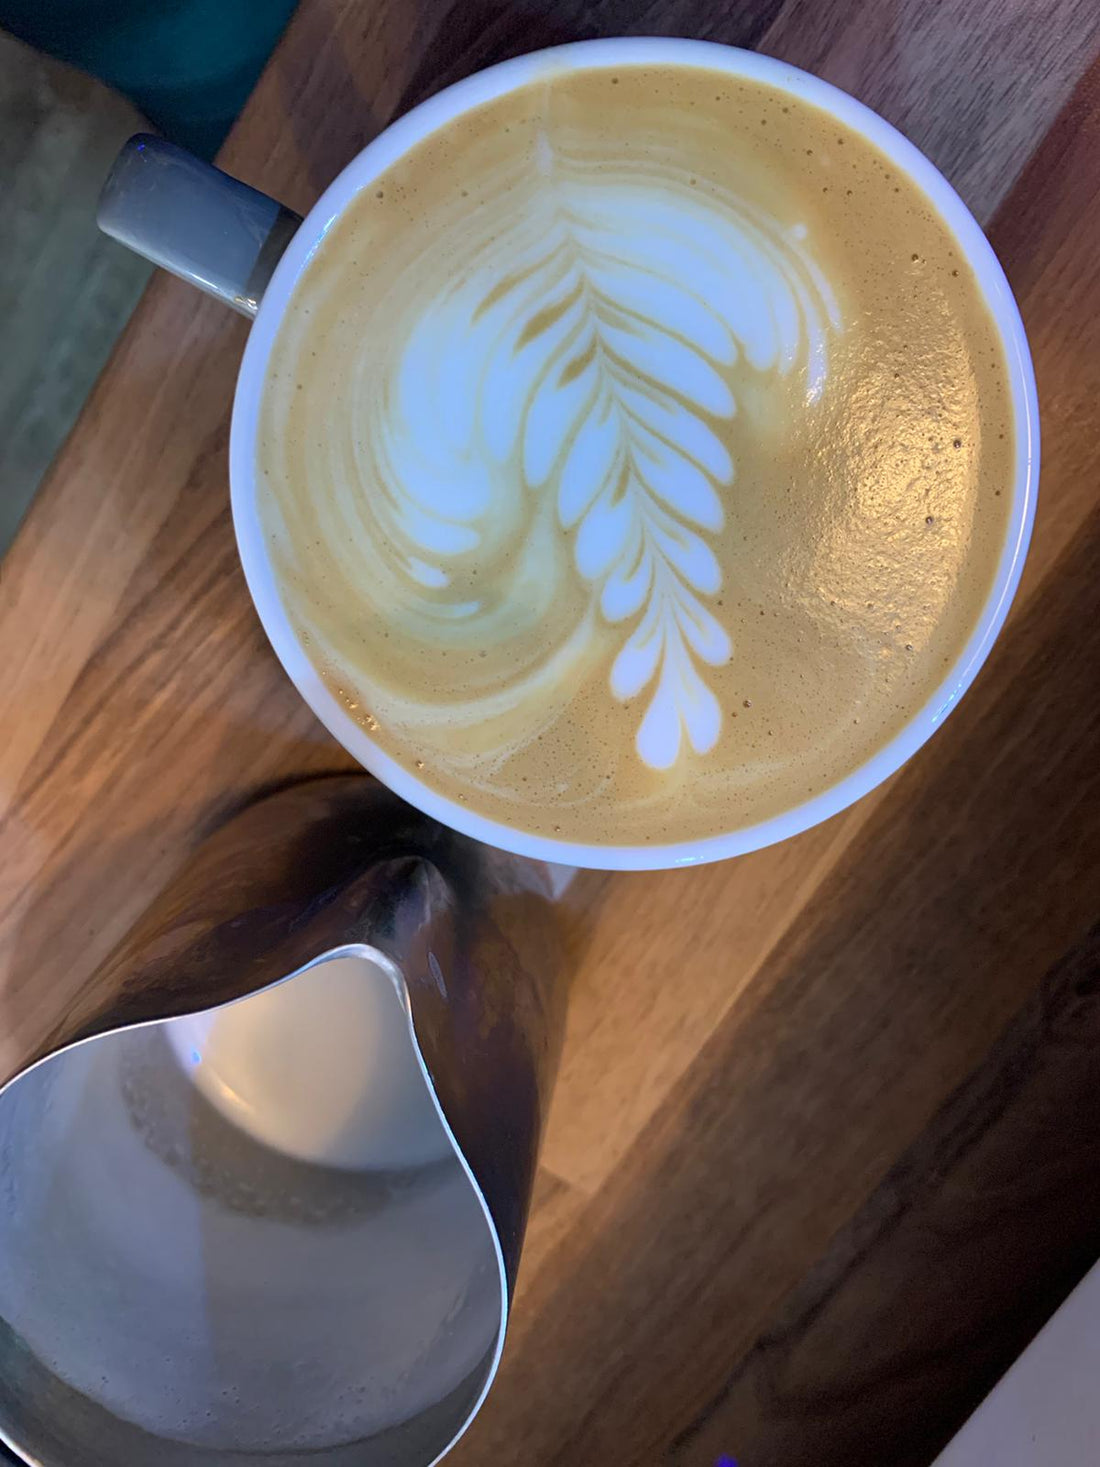
In the end, I had quite a bit of frothy milk. I started to pour the milk into my cup of coffee from my French press and then, before my cup was full, I stopped. I used a spoon to scoop some of the milk foam which was at the top of my French press onto the top of my coffee. Cafe baristas sometimes draw impressive latte art but I do not have a pitcher for pouring latte art at home. I just wanted to brew a delicious drink. I can think about the designs later. I had a cup of coffee with quite a bit of froth on the top. If I had wanted more froth, I could have pushed my French press plunger more.
The final coffee, made with Steampunk's Migoti Hill beans, was one of the best I have had. Like any good milk-based coffee, I was able to taste not only the sweetness from the milk but also some of the flavours from the coffee beans I was using. I could taste a bit of the cherry from the Migoti Hill and the milk in no way felt overpowering. The drink was balanced. Next time, however, I may use a bit more coffee to see if that would help me taste the coffee a bit more.
In summary, here is the recipe I used to make a cappuccino at home:
- Make 200 grams of coffee using a pour-over device (in my case, a Kalita Wave). An Aeropress may also work, although I have not tried using one for this purpose yet.
- Measure out enough milk to fill your cup and then pour that milk into a saucepan. Set the saucepan to a medium heat.
- Wait until you hear a simmer from the milk (or until your milk is at between 50 and 70 degrees Celsius) and then turn off the heat.
- Decant your milk back into your French press, or a pouring jug if you have one.
- Push your French press up and down until you get enough foam for your drink.
- Pour your milk into your coffee.
- Scoop foam from your French press onto the top of your coffee.
- Enjoy.
There is plenty of room to experiment with this recipe to adjust to your tastes. You could use more or less milk. You could create more or less foam. You could adjust the strength of your coffee. Indeed, there are many opportunities to express your creativity when it comes to brewing coffee. How about adding cinnamon on top?
You do not need an espresso machine to brew a cappuccino at home. With a French press, a pour-over brewing device, good coffee, and some milk, you can make a delicious milk-based drink that is topped with foam.
Contributed by James Gallagher, a home brewer and coffee enthusiast. View his excellent blog at jamesg.blog